Showing posts with label Wood burnt Art. Show all posts

Wednesday, December 12, 2018

Learn To Draw Comics

Learn To Draw Comics Movies, Anime, cartoons, and 3D animations, these are modern day entertainment that people could choose from if they are bored or something like it. A lot of people have overlooked the original and classic form of entertainment back when still pictures were the hit. What are these? Comics of course! Comics used to be the number one form of entertainment, back when TV did not exist yet. Reading comics is like having your own printed out movie. If you have a unique kind of sense of humor, and you like drawing, why not learn to draw comics? This would be very easy and fun at the same time! Here are some of the things you should consider if you want to start your own comic strip. What’s The Theme Of Your Comic Strip? Before you go on drawing in little boxes, determine first the type of comic strip that you want. Do you want a satiric comic? What’s the main theme? Is it about teenage life? Is it about married life? How about school life? Who are your intended readers? Is it about a super hero? Factors like these are important. Go ahead and brainstorm. If you are having a hard time on picking out a theme, get some inspiration with your surroundings. Observe people that you encounter daily or randomly. Try to come up with something new, fresh, interesting yet everyone could relate to. This would be a good basis of your whole comic strip. Have Some Characters You should also be equipped with a character line up. Have a main character and a couple of supporting characters. Map out the personality of each. Create their profiles, so that they could be unique from each other, yet you have had determined a working relationship for all of them. You do not really have to create a long list of characters. Just be ready with your main and a couple of staple characters. You can always add a new character to the gang in the future once you have a new idea for it. Now, practice drawing your characters. Draw them in different kinds of facial expressions and actions. Find A Setting You should also decide on a specific setting. Would it be during the Jurassic age ala Flintstones? Would you want it to be in a high school, just like Archie? Do you want to have your own imaginary city like Gotham city in the Batman comics? It all depends on your imagination. Once you have all these things settled out, that is the only time that you can start drawing. Draw Your Panel The panel refers to the number of boxes you are going to have in one strip. You can have three or four boxes for short strips that usually showcase only one scene or you can have hundreds that cover many pages that usually showcase a whole storyline. You can start out with short ones, just like the ones you see on your newspaper’s comic page. Have a plot for the scenes along with the dialogues you have in mind. Start plotting how you are going to fit your characters in the boxes, and then draw them. Put dialogue bubbles or boxes and write down their lines or thoughts. Once you are content with your drawing, put it into ink and erase sketch marks. Add some color if you want to, and you’re done! Website Stores http://art-and-craft-hobbies.com/ http://art-and-craft-hobbies.com/shop/ group Art Studio of Lewis Baber , Post and Sell your ART. https://www.etsy.com/shop/Magikaljourneys?ref=seller-platform-mcnavArt Two Old Guys Folk Art Share this:http://Gallery-Wall-Art.com http://wall-art-gallery.com facebook.com/groups/wallartgallerywallartgallery@groups.facebook.com


How to Make a Greeting Card

 How to Make a Greeting Card Making your own greeting cards can be both fun and rewarding. Many people cherish home-made greeting cards because they are a true expression of yourself and the person you are making it for. The first step in making a greeting card is to determine who you are making the greeting card for. What interests does the person have? What is the person's hobbies? Is the person your friend, family member, brother, sister, aunt, uncle, grandparent, parent, husband, wife, or significant other? The next step to making a greeting card is to decide if you want a funny greeting card or a sentimental greeting card. If you want a funny greeting card, you will want cut outs of cartoons, or you might want to draw your own cartoons. If you want a sentimental greeting card, you might gather cutouts of flower pictures. If you want a Christian greeting card, you might cut out some pictures of crosses or bibles. If you can draw your own, that's even better. But not everyone is an artist! You also need to decide why you are sending the greeting card. Is it for a birthday, anniversary, thank you, sympathy, holiday, Mother's Day, Valentine's Day, or other occasion? Maybe the greeting card is just because you care. If you want to send a birthday card, a picture of a birthday cake might be best. Or a picture of a flag for Independence Day greeting card would be nice. The next thing you have to do is write the copy for your greeting card. You can choose a poem you like or one that you know the person getting the greeting card will like. You could also write your own poem. You should remember though, that when you copy someone else's poetry onto your card, you cannot sell the card. Copyright laws forbid you to sell someone else's work without permission. But for the purposes of just making a greeting card for a loved one, copying a favorite poem, saying, or scripture is more than acceptable. Now that you know what you will put on the greeting card, who it is for, and why you are sending it, the next step is to gather all the materials you will need to put the greeting card together. You will want to gather cut outs of any pictures you want to include, as well as scissors, paste or glue stick, construction paper, crayons or markers, a pencil for outlining (in case you make mistakes), and don't forget your creativity! You may also want some lace, ribbon, doilies, pretty material scraps, paints, and other items. The most important thing to remember when creating your own greeting card is that the sky is the limit! There is no right or wrong way to make a greeting card. The only thing limiting your greeting card possibilities is your own creative mind! So break out those old magazines, poetry books, comic books, and cartoon strips, get those creative juices flowing, and make the best greeting card ever! Your loved one is sure to enjoy your hard work, effort, and how much you care showed by your handmade greeting card for years to come! Website Stores http://art-and-craft-hobbies.com/  http://art-and-craft-hobbies.com/shop/ group Art Studio of Lewis Baber , Post and Sell your ART.  https://www.etsy.com/shop/Magikaljourneys?ref=seller-platform-mcnavArt Two Old Guys Folk Art Share this:http://Gallery-Wall-Art.com http://wall-art-gallery.com facebook.com/groups/wallartgallerywallartgallery@groups.facebook.com  https:// wall-art-gallery.com  

Tuesday, December 11, 2018

Starting A Hobby In Art Collectibles


 If you look at some of the items that are popularly collected by hobbyists around the world, you will be surprised at how outrageous some of the items are. Toothpicks? Napkins? These things are given away for free at restaurants, why would anyone want to collect them? The truth is that some people are simply enthralled by the thought of collecting certain items. You surely realize by now that these items can be literally anything. However, one of the more traditional and widely acceptable hobbies is to collect art. Collectible art is very popular, and anyone can get into the hobby. All it takes is an appreciation for art, and the willingness to find additions to your new collection. Some people think that paintings are the only form of collectible art that is widely bought and sold. This is not the case at all. Collectible art can come in many different forms, from rugs to miniature wood carvings. Anything that is hand-crafted and beautiful in some way can be considered art, and is fair game for an art collection. If you are reading this, you probably have some specific form of art in mind. This is good and will give you a direction to start in, but you should always keep an open mind and look for other types of art that will expand your horizons and allow you to gain a wider variety of incredible items to add to your collection. As you view different art, you will probably start to notice particular artists who always stand out to you. This is a natural occurrence, and almost any art collector will eventually start to lean towards a certain artist who they appreciate above the rest. It could be one of the famous master artists, or even a local college kid trying to scrape by. Many art collectors will also gravitate towards certain themes or types of art. This is not a necessity by any means, but it will give your art collection a sense of unison. Some think of art collectors as people who have thousands of dollars to spend on paintings by famous artists. The truth is that you don’t need to invest any major amounts of money in order to get some beautiful, original art. The college student that I mentioned before exists in every town. You will never have a lack of “starving artists” to buy paintings from. Most of the best talent goes unappreciated, and by buying from amateur artists you could be buying an original work from the next famous painter. You can find paintings anywhere in the world. If you are taking a vacation to an exotic location, you can almost always find vendors selling paintings. In a place like India, you can buy paintings for just a few dollars. Usually they are very unique and different from anything you will see from western artists. So whenever you travel, be sure to take the opportunity to see if there are any local artists who you would like to support. It will diversify your collection, and make it more interesting in general. You may also have an interesting story behind each painting. Once you start to see more and more additions to your personal collectible art gallery, you will begin to realize what a rewarding and fun hobby art collecting is. Not only does it allow you to appreciate some of the beautiful creations of artists, it also gives you some great decorations for your home. So what are you waiting for? Art collectibles are widely available from many different sources, and if you are really passionate about the subject then you should get started today. Find out about some local artists, and attend galleries or art festivals where you can see literally hundreds of artistic items on sale. Every item you see has the potential to be the first addition to your collection.


Website Stores
 http://art-and-craft-hobbies.com/
http://art-and-craft-hobbies.com/shop/

group Art Studio of Lewis Baber , Post and Sell your ART.

https://www.etsy.com/shop/Magikaljourneys?ref=seller-platform-mcnav
Art Two Old Guys Folk Art

Share this:http://Gallery-Wall-Art.com

Claude Monet-Impressionist painting

Claude Monet-Impressionist painting Claude Monet Biography DescriptionOscar-Claude Monet was a French painter, a founder of French  and the most consistent and prolific practitioner of the movement's philosophy of expressing one's perceptions before nature, especially as applied to plein air landscape painting. Wikipedia Born: November 14, 1840, Rue Laffitte, Paris, France Died: December 5, 1926, Giverny, France Known for: Painter Movement: Impressionism Spouse: Alice Hoschedé (m. 1892–1911), Camille Doncieux (m. 1870–1879) Education: Académie Suisse (1859–1860), École Nationale supérieure des Beaux-Arts


Website Stores http://art-and-craft-hobbies.com/ http://art-and-craft-hobbies.com/shop/ group Art Studio of Lewis Baber , Post and Sell your ART. https://www.etsy.com/shop/Magikaljourneys?ref=seller-platform-mcnavArt Two Old Guys Folk Art Share this:http://Gallery-Wall-Art.com 

Monday, December 10, 2018

How To Start Your Own Gallery


 So you are an art collector at the moment, with several pieces of art in your collection, and have noticed just how profitable the world of art can be for individuals looking to get into it in terms of business rather than as a hobby. It may seem like a romantic notion to have your own art gallery and be able to influence the world of art in a small way, but that is often not the reality. Starting any business of your own is extremely difficult, but starting an art gallery can be one of the most difficult of business tasks. You not only have to have a measure of artistic talent, as such, but you have to have a great deal of business sense. However, there are several tips that can help you on your way if that is really what you want to do. 1. Never open your own art gallery if it is only for the money - If you are in the gallery business for the money then look elsewhere because most galleries only make enough to cover the bills for the first few years. Until your business is established, you have next to no chance of making enough money to call your business a success. You should open the gallery because you love art and not to make a profit. If you do make a profit then that is a bonus. 2. If you have no knowledge of art collecting then do your homework beforehand - If you know nothing about art collecting then running an art gallery is not for you, but if you are determined then you need to learn all of the ins and outs of art collecting before you can own a gallery. This will take you at least six months if not longer so be prepared to be in it for the long haul. 3. Tap into your passion for art - A passion for art is a must and is necessary if you really want to attract both artists and sponsors alike. It is also necessary when trying to advertise any events that you have in your calendar. Beware of letting your love of art get in the way of your business head. 4. Know exactly what it is that you plan to do - You should have an aim, a goal, before setting up any business. If you want to own an art gallery then you should have a target for sales and a target for your involvement in the community too. 5. Find out where the best location would be before renting premises - Of course, if you are planning to set up business in a village with 250 working class inhabitants then it is to be expected that business will not be booming. However, if you have a good location in the centre of a town with little competition and middle class demographics then you will do far better. Check out rents and your audience before you actually put a deposit down on your potential gallery. 6. Have a business background - You must have business skills in order to make your art gallery work. Without business acumen, the likelihood is that you will be one of the businesses that do not see two years, and there are way too many of those around at the moment! 7. Brush up on your people skills - You need people skills to be able to attract artists, sponsors and press attention and should be able to make all of those feel comfortable in your gallery. Attracting customers is also a big part of any business so make sure that you are well prepared! Photo by Sharon McCutcheon on Pexels.com There is so much more to opening a gallery than meets the eye. You have all of the mundane tasks like hanging promotional materials, publicizing events, making sure that artists want to trust you to sell their work, courting the press and any number of other tasks that get tiresome and boring after the first few weeks. If you are prepared to do that and dedicate yourself to the pursuit of the fine arts for the rest of your life then it may be for you. You must certainly be prepared to work hard. Just make sure that you are getting into art gallery owning for the right reasons instead of the romantic image that you have in your head.


Website Stores http://art-and-craft-hobbies.com/ http://art-and-craft-hobbies.com/shop/ group Art Studio of Lewis Baber , Post and Sell your ART. https://www.etsy.com/shop/Magikaljourneys?ref=seller-platform-mcnavArt Two Old Guys Folk Art Share this: http://Gallery-Wall-Art.com

Start an Art Collectible Hobby and Beautify Your Home


Start an Art Collectible Hobby and Beautify Your Home Collecting is a fun hobby, and one of the most interesting things to collect are art collectibles. Many different items can be painted with artwork and become an art collectible. Hobby enthusiasts collect such things as saw blades, and wooden eggs which have had artwork painted on. People even collect designer rugs as art. Another art collectible hobby is collecting limited edition plates, thimbles, Christmas ornaments, and figurines produced by such companies as Bradford Exchange. And of course, many people collect fine art paintings. The person with an art collectible hobby will probably find his or her own favorite artists whose works they appreciate. They can choose to focus on one particular artist, either past or present, or they can choose from the works of many artists. On the other hand, they may collect art and art objects around a theme they enjoy, such as cigars, wild animals, or piano music. One may think of an art collector as a rich person who has the money to spend hundreds of thousands of dollars on an original Van Gogh. A person of more modest means can collect art too, however. Post cards are a good place to start. Most art museum gift shops offer high quality, glossy postcards printed with some of their more notable acquisitions. By buying those cards one really appreciates, anyone can have an art collection. Ebay is a good source of art collectibles whatever type of art or collectible you fancy. In fact, if you are just starting out, the choices and options can be overwhelming! Just remember that you can sell your own belongings as well as buying those of others. This should make the impact on the budget a little less powerful. Other ideas for inexpensively collecting art collectibles are scouring flea markets, thrift shops, and garage sales. You never know what treasure someone else may be getting rid of. One nice thing about art collectibles is that artists can be found in every part of the world. The art collector should scout the local art shows, museums, and artist's hangouts to find out just what sort of talent can be had less expensively and close to home. Because of the local flavor of some artwork, art collectibles make good travel souvenirs. For instance, the artist Linda Barnicott specializes in paintings of scenes, buildings, and landmarks found around Pittsburg, Pennsylvania. Similarly, collectors can find local artist almost everywhere. An art collectible hobby will keep you interested in life and give you a home filled with art masterpieces as well. If you enjoy pretty and interesting things around you, consider starting an art collectible hobby today.   Website Stores http://art-and-craft-hobbies.com/ http://art-and-craft-hobbies.com/shop/ group Art Studio of Lewis Baber , Post and Sell your ART. https://www.etsy.com/shop/Magikaljourneys?ref=seller-platform-mcnavArt Two Old Guys Folk Art   Share this: http://Gallery-Wall-Art.com

Sunday, December 9, 2018

Craft a Garden Scrapbook

How to Craft a Garden Scrapbook Garden scrapbooks can present a natural feeling when the audience is reading your storybook. Flowers are one of the popular natural-based elements that many people cherish. You can store flowers in a scrapbook to craft a garden style creation. To start you will need a dried flower. Compress the flower placing it into your scrapbook pocket, such as the memorabilia. Next, glue, tape, etc, the flower so that it is sticking on the page securely. You may have seen flowers preserved in bibles. The process in scrapbooks is similar, only you want to stick the flowers so that it does not fall out. How to craft flowers for scrap booking: You can use corsages, bouquets, or the colored part of the flower to craft your garden scrapbook. The compressed and dried flowers should be in a straight line, added to your scrapbook page, and smoothly seated near your photographs. Your dry flowers and compressed flowers should be laminated. Use Xyron, or any acid-free product to laminate your flowers. During the fall is the best time to pluck materials to make up a garden scrapbook. As you make up your garden scrapbook consider title page, captions, journal, lettering, photos, plant species, headings and more. If you are adding fall leaves to your scrapbook, you may want to visit a copy shop. You will need to place the leaves in a sealed container when transferring the leaves. The leaves with depreciate over time if you fail to follow instructions. You can add the leaves at your title page to start your garden scrapbook. If you are making up a scrapbook to present your garden, snap a few pictures and make up a blueprint. The blueprint should include each detail of your garden. Following, you can add a journal to let your friends and family know how you invented your garden. When to take photos: Spring, summer, winter, and fall is the best time to take photos of your garden. Each season provides you a variety of colors, shades, texture, blooms, etc. Once you snap the shots add them to your garden scrapbook. If you want to get created you can cut, paste, and add extras to your scrapbook, i.e. cut magazine clips based on your garden theme and add them to your scrapbook. Also, you can add tips beside your pictures to help your family and friend learn. During the seasons, you want to document your gardens activities as well as your own to create a genealogy, and history of your scrapbook. Record detail specifics to help your audience learn from your efforts. During the summer record, the blooms so that when winter comes you can look back on your success. When the blooms start to grow, you may want to snap photos so that you can add to your scrapbook. Try crafting your scrapbook in a chronological order so that your book tells the story you want to portray to the audience.  Some people add special rocks to their scrapbook. If you decide to add, rocks try to find the small, flat rocks. The thicker, bulk rocks will only interrupt your scrapbook. Flowers are beautiful inside scrapbooks. The flowers that set off garden scrapbooks include roses of all colors, daffodils, tulips, crocuses, and so on. Still, if you add flowers to your scrapbook you want to use petals that harmonize with your theme. For instance, if you are crafting a summer page, then use colorful flower copies. If you are crafting a fall theme, then use the flowers that flow in harmony with your theme. Website Stores http://art-and-craft-hobbies.com/ http://art-and-craft-hobbies.com/shop/ group Art Studio of Lewis Baber , Post and Sell your ART. https://www.etsy.com/shop/Magikaljourneys?ref=seller-platform-mcnavArt Two Old Guys Folk Art   Share this: http://Gallery-Wall-Art.com      

How to Craft Chimes

[caption id="attachment_176" align="alignnone" width="613"]decoration design hanging love Photo by Manesh Xavier on Pexels.com[/caption] How to Craft Chimes Did you know that you could take old reddish-brown clay made of unglazed ceramics to make chimes? (Terra Cotta Pots) The pots will make up a nice batch of chimes. To get started you will need up to ten ceramic pots. The diameter should be around 1 ¼ inch and up to 1 ¾ inches. You will need wood, 4 inches time’s six plates and varnish finish. You will need up to ten 5/8 inch grommet screws. Add up to ten rounds of beads made of wood and around 3/8 inches of spool, i.e. up to 30 pounds of anglers’ line. You will need wire up to 20 yardsticks, i.e. spools and a 7/8 inch grommet screw. How to make chimes: Now you are ready to make your chimes. On the wooden plates, add a coat of varnish, allow drying, and continuing a few times adding the varnish as needed. Use your grommet 5/8 screw, and screw it in by hand, screwing it into the plate. If you add, additional screws keep them an inch apart. Cut your line measuring lengthwise. Next, at each end feed the line through, and into the grommet screw. Work the line through until you reach the lower region of the vessel. Once you finish the step, run another line measuring lengthwise through your beads of wood, and fasten so that it forms a dual bond. You can use adhesives to fasten the area if you feel the need to do so. Take the other vessels you have available to create your chimes, threading them and regulate the measurement lengthwise as needed. You can now add the grommet 7/8 screws to hang your chimes. Fasten the screws at the middle of your crown plate. Use the wire outlined in this article to hang your chimes. You are now finished with your chimes. To complete this article I will give you a few tips on crafting snakes to place beneath the lower areas of your door so that you can keep wind out during the cold months. If you do not have a yard of fabric around your house, purchase a yard of strong textile weaves of fabric or corduroy. You will need thread that coordinates with your fabric. In addition, you will need stuffing, dry beans, and rice. Add some adhesives and felt, preferably red, white, and black. Next, gather your fabric and trim up to 10 inches wide, and around 6-inches lengthwise. Measure your door before cutting, since you will need length wider than the bottom area of your door. Use two parts of the outer regions of your fabric, gather and hand or machine sew at least 3 sides and around 3/8 inches away from the edge of your fabric. You will need to leave a short region of your fabric available. On the right side of your fabric conceal your seams and add your filling, i.e. stuffing. Turn up your edges and then stitch them and choose additives to design your snake. You can use glue, buttons, studs, etc to make your eyes if you choose to do so. As well, you can use your felt to make up the mouth, nose, and so on. Use the red felt to make the lips, tongue, etc, and the black to make up the surrounding features about the eyes, since as lids, or brows. The snakes will make up a great warming gift also. You can craft a few to give to your friends, as well as keep a few around your home to keep it warm in the winter months. [caption id="attachment_181" align="alignnone" width="647"]photo of hats hanging on tree Photo by Artem Bali on Pexels.com[/caption] Website Stores http://art-and-craft-hobbies.com/ http://art-and-craft-hobbies.com/shop/ group Art Studio of Lewis Baber , Post and Sell your ART. https://www.etsy.com/shop/Magikaljourneys?ref=seller-platform-mcnavArt Two Old Guys Folk Art   Share this: http://Gallery-Wall-Art.com

Saturday, December 8, 2018

How to craft a Bonnet

Shallow Focus Photography of White and Red Doll


How to Craft a Bonnet To create a porcelain doll bonnet, first determine the size of your doll head. Once you have the size you will need materials. You can use wire to mould your bonnet if it is less than 10 inches. You can use any type of material you choose to make your bonnet, including batiste. The materials you will need are 6 inches of fabric (white), such as the batiste. You will need a couple of edge laces, say around 2 ½ yards and ½ inches of lace edge. Gather 36 inches of smooth craft wire. You will need 28 inches of dual side rayon fabric, such as satin ribbons and a set of wire cutters, and pliers with a long muzzle. Once you gather your materials, you can start your methods in creating your bonnet. You will need art paper to create your patterns. Once you finish you will carve two sou’ westers: (i.e. bonnets) you should have two rows of lace, which one is on top and the other. Once you have your patterns make a wavy edge forming the scallop near the lace edge and continue to the middle of your bonnet. Stitch together the right side and form a straight-line stitch to lace the edges in order and to connect to the edges of the neck and the edges at the top. To show lace when the bonnet is turned, the lace should jut out over your seams at the finish of your hat. Now, use your lining and place it over your sou’ wester and begin stitching it collectively over the prior stitch lines to the edges of the neck and edge of the crown. Leave open your ends, turn your bonnet at the inner recesses, and out so that the lace shows at the crown edges and neck, and then press. Use your pattern and stitch along the lines. You want to create a cover for the wire. Next, sew one more edge of lace underneath the hat on the left side and continue to the right. Stitch in the direction of your line and cover near the edges of your crown. Stitch your wavy lines at the crown into the lace and continue to the outer edges. Now you will need to cut the ends of your hat. Use your wire cutters and cut along the lines of your wire so that it fits 11 inches of the edges of your crown. The last edge of your crown will need 8 ½ inches of wire. The center should be 7 ½ inches and the edges of the neck should be 7 inches. About ¼ inch, curve the ends of your wire. Next, weave your wire into the covers evenly at one finish of your untreated edges. Bend the wire ¼ inch with your pliers and another quarter over until the wire is secured. Pull up your fabric at the edges of the crown, including the other crown edge and add your wire to the center and at the edges of the neck wire. The wire will extend to the other finish area, which you will need to trim the curved ends once you check to make sure that the area is balance. You want to avoid allowing the wire to ride to the cover. Next, bend the wires ¼ inch twice and secure your ends. You want to even your decorative fabric edgings, which once your bonnet is completed you can trim your ribbon, creating dual 14 inch lengthwise cuts and fix your ribbon to the side of the hat. If you would like additional designs, such as the rose-shaped badge (Rosette) you will need to use rose grubs and embroider them onto the ribbons.


Website Stores http://art-and-craft-hobbies.com/ http://art-and-craft-hobbies.com/shop/ group Art Studio of Lewis Baber , Post and Sell your ART. https://www.etsy.com/shop/Magikaljourneys?ref=seller-platform-mcnavArt Two Old Guys Folk Art   Share this: http://Gallery-Wall-Art.com    

Friday, December 7, 2018

Buying Paintings: Gothic Art
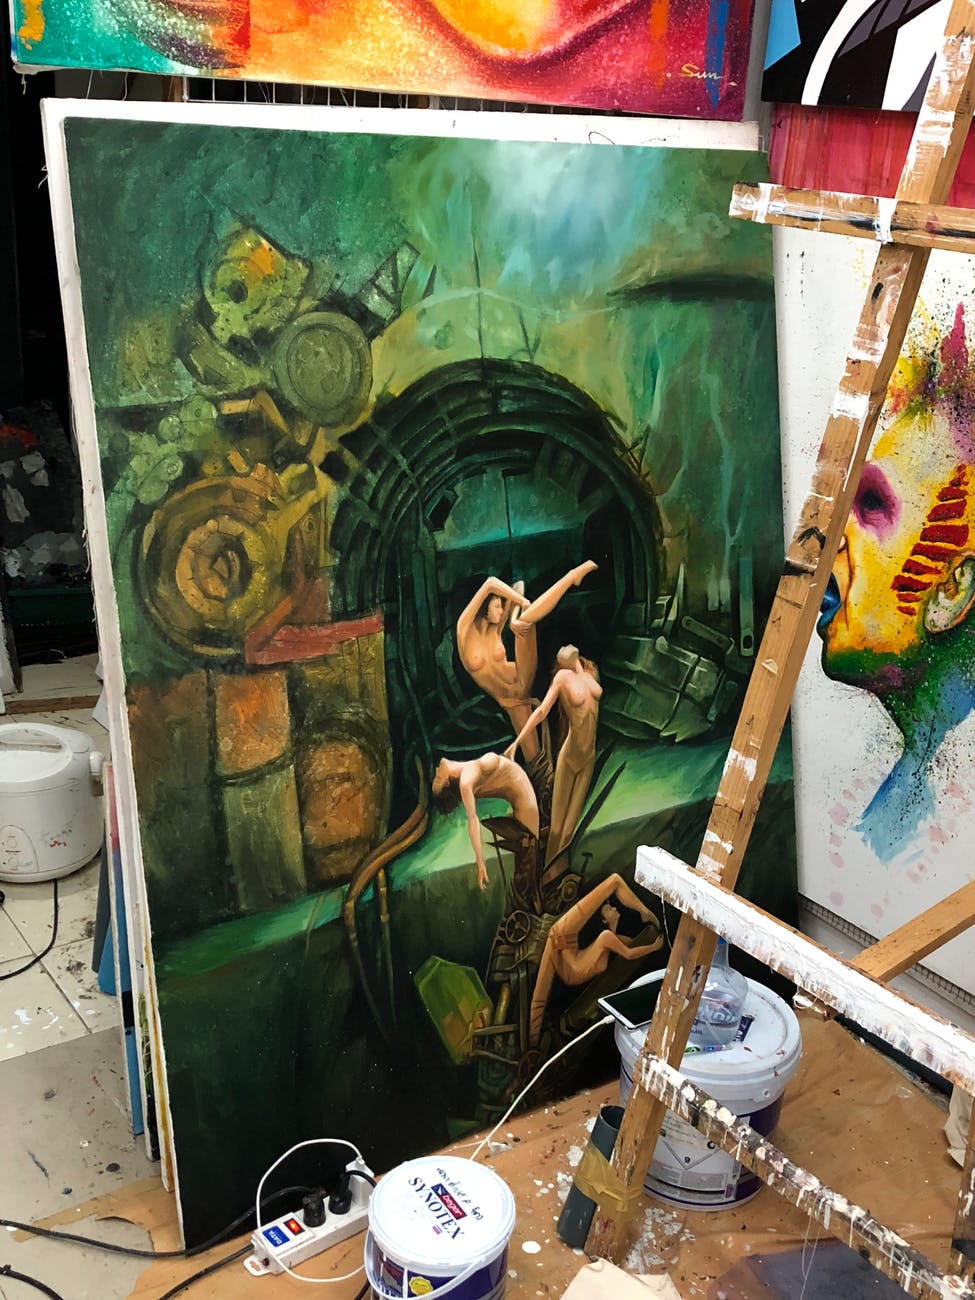
Buying Paintings: Gothic Art
photograph of paintings Photo by Rene Asmussen on Pexels.com[/caption] Some of the most valuable early artwork comes from a point of time before the Renaissance had begun, and going on through the early Middle Ages, referred to as the period of Gothic art. During this particular time in history, the artwork took on telling narrative stories through pictures, and much of these pieces were Christian and secular in nature. Some of the earliest examples of Gothic art are sculptures found on cathedral and abbey walls, and the first real form of Gothic artwork began as architectural works in fact, even becoming the subject matter for many stained glass windows at the time. The style of painting that further defined Gothic art wasn’t produced until nearly fifty years after Gothic architecture and sculptures, and even though the break between Romanesque artwork and the Gothic styles has remained imprecise at best, the beginnings of Gothic artwork seems to occur in various areas at different but related intervals. The artwork began in England and France around 1200, and in other areas like Germany and Italy between 1220 and 1300. The paintings stayed just as narrative as the architecture on church walls during this time, and has stayed the territory of secular storytelling for a long time afterwards. Though Gothic art in paintings has had a relatively short time as the medium of choice amongst the artists, there is evidence that the artwork falls into four particular styles of these paintings, and these were the most common forms during this time period. The fresco, the panel painting, the illuminated manuscript, and the artwork done on stained glass are all depictions of Gothic painting. Of these particular types, stained glass artwork had remained a strong reminder of those ages long past, and is still created by master artisans that learned their trade skills from these dark ages. In the case of the other three particular forms of Gothic painting, frescoes continued to be used as the pictorial narratives on church walls in southern Europe, and were a consistent incorporation of early Christian and Romanesque traditions. In Italy, during the 13th century, the panel painting began and spread throughout Europe. With this proliferation, panel paintings became even more predominant by the 15th century, and becoming even more popular than stained glass at the time. Since not all monumental works have survived, illuminated manuscripts are the most complete record of Gothic painting, and provide a comprehensive account of styles that would otherwise perished. As the state of the world began to change, so too did the interpretations of the artwork as a reflection of these changing times and attitudes, and the movement became known as International Gothic by the late 15th century. From there, it had evolved into an art form depicting not just secular stories and allegories, but also resulted in the occurrence of more illuminated manuscripts and paintings as increased trade and the rise of cities and universities grew. With this proliferation of growth, more people were literate, and lead to better records kept with this occurring. Leading up to many of the well-known medieval artists today. The International Gothic style of artwork was developed in Burgundy, Bohemia, and northern Italy in the late 13th and early 14th centuries. During this period in Gothic art, artists traveled widely around the civilized world at the time creating a common aesthetic among the aristocracy of the time, and removing the concepts of contrary artistic styles. The main influences for this period in artwork were derived from northern France, the Netherlands, and Italy. It was during this time, that aspects of rational uses of perspective and setting became a common feature, and other features included flowing lines and rich coloring. In the case of Gothic sculpture, it had evolved from the elongated forms of the Romanesque style, and became a more naturalistic expression in the early 12th and late 13th centuries. Influences from Greek and Roman statuary were incorporated into drapery, facial expressions, and poses. The sculptor Claus Sluter and the changing tastes for more naturalistic styles became a harbinger for the end of the Gothic period of art, and signaled the beginning of the evolution into Renaissance period at the end of the 15th century. [gallery ids="162,168" type="rectangular"] In a time period where upheaval was the normal occurrence of many of the people then, Gothic art fell into the broad scope of medieval artwork that included such disparate elements and styles as Viking art and Celtic art, but in varying degrees relied upon the artistic heritage of the Roman Empire and the early Christian Church. In fact, much medieval artwork has the history of these elements conjoining and converging into the remarkable artistic legacy we read about today, and have contributed over time to the outcome of many other forms of art  Renaissance


 Website Stores http://art-and-craft-hobbies.com/ http://art-and-craft-hobbies.com/shop/ group Art Studio of Lewis Baber , Post and Sell your ART. https://www.etsy.com/shop/Magikaljourneys?ref=seller-platform-mcnavArt Two Old Guys Folk Art   Share this: http://Gallery-Wall-Art.com    

How to Craft Basket Flowers

 flowers colorful plants bloom Photo by Pixabay on Pexels.com[/caption]

How to Craft Basket Flowers We have walked through the steps of creating the May basket, now it is time to craft your flowers. We have added handles, basket, etc, to your quilt, which at this time you should have created six blocks to make your basket. How to create flowers: We are quilting flowers. On the left side of your fabric, you will have invented pink squares. You can trace your pattern to start your project. Trace at least one flower (Choice), use your outside solid lines, and repeat your steps to create the foliage, or leaves. Use the variety of green patterns and use the yellow narrow pieces to create the center of your flower. You can design roses if you like. Use a variety of greens, red, pink, white, etc, if you intend to create roses and petals. Along the lines, you have marked, cut the fabric strips sewn onto your fabric, the shaped patterns that form your design, cutting only near the lines. Use freezer paper and turn it over so that you reveal the side that does not have a shine. You want to create a starting line for the six centers of your flowers, and the flowers also. Once you mark the 12 parts, mark the leaves (12), marking them inside the dash lines. Now you are ready to cut your shapes. You will need an iron and board. Use your hot press, or iron to press the flowers on your paper, pressing in the middle of your flowers on the left side and in the middle. You want the glossy paper turned in the direction of your fabric flower at this point. Do the same with the center of the flowers and foliage. Next, collect your yellow filament/thread and tone it with the center of your flower. If the colors do not match, try another shade of yellow. Run lines of stitches into your cloth, which encloses the ring of the freezer paper. You want to congregate your material around this ring, so pull your filament up at the end. Now, tie your thread, press the ring, and use your starch bottle, spraying the region. Do the same for the center of your flowers. Next, use your variety of green filaments that match your leaves and collect the allowances at the seam. (1/4 inch) Collect around the foliage and streamlines of stitches along your fabric, about the enclosed region of your ring that is designed on the freezer paper. You want to collect your textile about the ring. Pull your filament/thread up at the finish and tie it, pressing the ring. Again, spray with starch. When you congregate your allowances at the flower seams, snip the inner points of the flower corolla/petals where the flower collectively forms a ring. You will need to collect your thread that matches the color of your petals, such as pink. Just as you collected the edges of your leaves, do the same for your corollas. Once you finish running stitch lines in your fabric, which you have enclosed freezer paper about the ring, you will need to gather your material about the ring. Next, pull your strands of thread up at the finish. Next, bind your filament and then press the ring. Press, and spray the region with fabric starch. Now seam your allowances, i.e. snip the central points of the leaves, flower center, etc where the flower collectively forms a ring. Press and starch to complete your crafting task:   [gallery ids="137,133" type="rectangular"] Now you are ready to assemble the top of your quilt. After you assemble, you can move to finish your craft. Website Stores http://art-and-craft-hobbies.com/ http://art-and-craft-hobbies.com/shop/ group Art Studio of Lewis Baber , Post and Sell your ART. https://www.etsy.com/shop/Magikaljourneys?ref=seller-platform-mcnavArt Two Old Guys Folk Art   Share this: http://Gallery-Wall-Art.com